Thursday, August 30, 2012

Waiting for Jadon: Simple Curtain Tutorial

I am now nine days past my due date!

Knowing that I'm looking for projects to do, a friend emailed me last night with a request. She just moved into a new house this month and needs a curtain to cover the clutter of a kitchen shelf stacked with spices.


She gave me the fabric she wanted and we discussed the look she was going for. She wants the curtain to cover everything on the shelves, hang from a simple rod, and be slightly gathered. Basically, she was envisioning something like these curtains I found on Pinterest:


Here's the tutorial to make a simple curtain for yourself!

The dimensions of her shelf are 24.25" wide and 40" tall.
I cut the fabric 36" wide (to have enough fabric to create the gathered look),
and 46" tall (to accommodate for hems and the loop of fabric around the hanging rod).
To create the side seams, I fold the sides of the fabric over once...
...and then again. This hides any fraying edges.
I used to always pin the fabric down before I started sewing, but sometimes I don't have to anymore.
These vertical stripes are such a handy guide to make sure I'm sewing straight! 
Now to create the loop at the top which will go around the rod. I started by sewing a half inch hem.
A half inch hem can be made easily by folding the fabric over and making sure it lines up with the width of the pressure foot. Just a little trick I discovered a few years back. It's saved me from a lot of pinning! Notice that my needle is oriented slightly to the left. I wanted my seam to be a little closer to the edge of the fabric, so I changed the setting on my machine to have the needle be a little off center.
Then, you fold the edge with the half inch hem over again. Make sure that you create a loop large enough to slip your rod inside. Since my friend bought a skinny 5/16" rod, folding the fabric over one inch will give us plenty of room.
If you still aren't in the mood for pinning, you can use these handy lines on your sewing machine as a guide. When your machine needle is in the center position, the line labeled "6" is exactly 6/8" from the needle. Similarly, the "3" is exactly 3/8" from the needle.
I lined up the edge of my fabric with the line labeled "6," and kept the needle in the off-center left position. This means that my seam is *about* 7/8" from the edge. That's close enough to an inch for me.
Now you have a nice, even loop to hang on a rod, as demonstrated with the pencil. The side hems and the top loop is done. Before I could sew the bottom hem, I had to do a little more thinking about the total length of the curtain.
I knew my friend's shelf was 40" tall, but was that the height of the shelf, or the distance from the rod to the floor? If I made the curtain 40" long, but the rod is 38" off the floor, the curtain would drag on the floor, which would look funny. I called my friend and she told me to make the curtain 39" long since the rod would sit about 1" from the top of the shelf. As I would need about an inch to create the hem at the bottom, I carefully measured 40" from the top of the curtain and trimmed off the excess fabric.
I folded a half inch, and then another half inch to create the bottom hem. Following the width of the pressure foot, and making sure the stripes continued to line up properly, I completed the final hem.
When I brought over the finished curtain, she had the dowel rod ready, and we slipped it easily into the long loop of fabric. Her husband had already installed the little white hooks into the shelf for hanging the rod. You could also buy a tension rod that fits inside the top shelf for hanging the curtain.


Now all she needs to do is cut the dowel to the width she wants. We've already started talking about ways she could use the leftover striped fabric somewhere else in her kitchen. Window curtains? Chair cushions? Hot pads? The possibilities are endless!

Tuesday, August 28, 2012

Waiting for Jadon: Cloth Wipes Tutorial

I am one full week past my due date. I'm not that surprised, actually, especially knowing that my mom carried late with all five of us kids (I, her first, was two weeks late and everyone else was at least 10 days late). I wonder how much longer this kid will go? Luckily, while Jadon waits, I get to do more projects!

Yesterday's task was making cloth wipes. As I am already committed to cloth diapering, using cloth wipes seems like a no-brainer. It's not like I'll be doing any extra laundry; they'll just get tossed in the wet bag and the washer with the diapers. I'll be saving even more money by not having to buy disposable wipes, and I'm generating even less waste.

Apparently, the most popular fabrics for cloth wipes are flannel or fleece. Many people recommend using old receiving blankets to make cloth wipes. You cut them into squares, double them up, and sew them together. Other people prefer cloth wipes with more texture so that they use fewer wipes with each diaper change. They cut up old towels, which don't need to be doubled because they are so thick.

I decided to use live in the best of both worlds and make cloth wipes out of flannel and towels! I also made a set of cloth wipes for a friend who just joined the cloth diapering club with her three-week old daughter. Other cloth wipers recommend having 1.5 wipes for every diaper, but I wanted more so that I won't run out. I made each of us a set of four dozen cloth wipes.

Here's a tutorial for how I made my wipes:

I don't have any old receiving blankets yet, and I didn't have the heart to cut up my new ones. So, I bought a handful of receiving blankets at a secondhand store and used a rotary cutter to make 7x7 inch squares.

Look at the cute fabrics! Too bad these are going to get covered in poop.
Then I gathered some old towels from around our apartment. My mother-in-law also contributed a few towels that she didn't need any more.

I didn't end up using all of these towels, but I'm glad that all those hand towels are gone now.
They've sat untouched in my closet for months.
The towels also got cut into 7x7 inch squares. For those of you who have never experienced the wonders of a cutting board and rotary cutter, feast your eyes on a quilter's best friend:

Nice straight lines in just seconds!

I folded the towel in half and got 24 squares out of it.

 All the flannel and towels are cut and ready for sewing. 
The cutting can be a little tedious, but it's so much faster than cutting with scissors. Now you're ready to sew. There are two options for putting your layers of fabric together. For a more polished look, a serger is ideal.

A serger trims excess fabric while binding the edges with thread at the same time.
You will see serged edges inside most of the seams in your clothing.

"Why, serged cloth wipe! What nice, clean edges you have!"
"The better to prevent fraying, my dear!"
If you do not have a serger, you can also use a zig-zag stitch on a sewing machine to bind the flannel and towel layers together.  I found that putting the towel on top and the flannel on the bottom worked best. When I tried putting the flannel on the top and the towel on the bottom, this annoying bunching started happening.

DO: flannel on the bottom, towel on top.
DON'T: towel on bottom, flannel on top. Makes fabric bunch up.
If you sew the layers together, your wipes may need a little trimming after you get all the way around. Whatever fabric is sticking out too much, just snip off with scissors. The serger will do this step for you, but most of us don't own sergers (I have to go to a friend's house in order to use hers).

Before trimming......after trimming!

After you get through all your wipes, you have a nice thick stack of cloth wipes to wipe a baby's bum with! I can't wait to give this set to my friend.


*UPDATE September 2013: I improved my cloth wipe design! Check it out: Cloth Wipes: New and Improved!*

Sunday, August 26, 2012

Waiting for Jadon: Am I Ready For Cloth Diapering?

I am now five days past my due date. Still no labor signs. Just waiting. Maybe God knew I needed the extra time because I just found out yesterday that my cloth diapering system was not quite ready.

Aside from the fact that I've never had a BABY before, cloth diapering feels the most foreign to me as I prepare for my new role as a mom. I have diapered dozens of babies over the course of my big-sister and babysitting career. However, none of these babies were ever cloth diapered.

At first, the world of cloth diapering seemed really complicated. So, I did my research (thank you, internet!) and asked questions. I watched a lot of YouTube videos (try "Cloth Diapering 101") and visited a lot of websites (pinstripesandpolkadots.com is amazing!). I've even joined a couple of cloth diapering Facebook groups to glean tips from the other cloth diapering moms of the world.

Cloth diapers appeal to me for several reasons. I like the fact that we will be generating a lot less garbage by using and reusing cloth. It's nice to know that we will never "run out" of diapers unexpectedly and have to make a mad dash to a store (unless I get behind with the laundry!). I also like that children in cloth diapers tend to suffer less diaper rash and potty train earlier.

The best part about cloth diapering is the money factor. Cloth diapering is going to be cheaper than disposables for any family, but for us, it's practically free! I received all of the covers, prefolds, inserts, wet bags, and liners we could ever need as gifts or loans. One of my cousins finished cloth diapering her daughter a few years ago and gave me her entire stash. A close friend has a two-year old in cloth diapers, but is letting me use her infant-size covers while Jadon is small. Even several guests at my baby showers gave me cotton prefolds, knowing that I wanted to do cloth diapering.

All of these items currently sit proudly on my "changing table" (a desk my husband found on the side of the road) in neat little stacks. I like to walk in the room and admire how neat and organized and ready everything is.


All organized and clean...until Jadon gets here.

But then, earlier this week, I remembered that I have to wash all the prefold diapers prior to using them. Otherwise, they won't become quilted and absorbent. Having done my research, I faithfully ran all my prefolds through five hot wash cycles with detergent, and then through one more rinse. I transferred them to the dryer and eagerly waited to pull out the fluffy, warm, quilted prefolds that I had seen in the YouTube videos.

All 27 prefolds came out of the dryer warm, but only five were fluffy and quilted. The rest were frayed and gauze-like. What happened? Had I messed this up already?

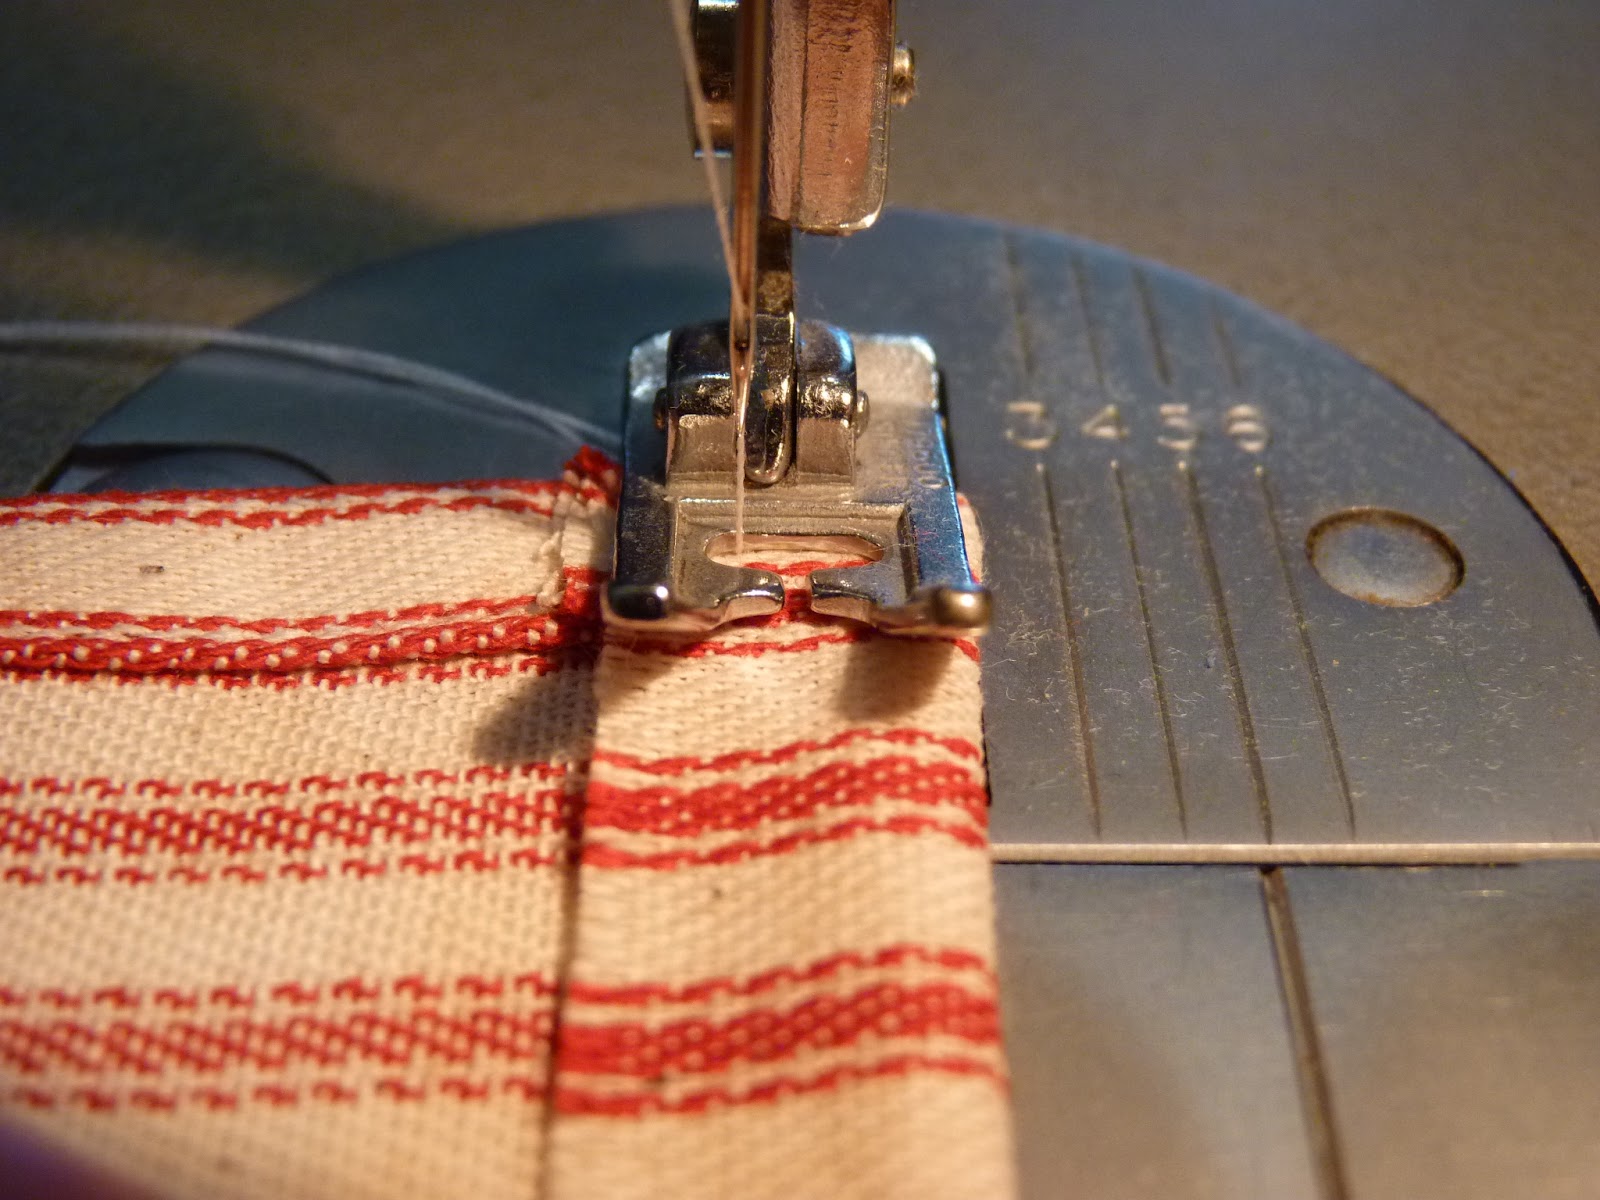
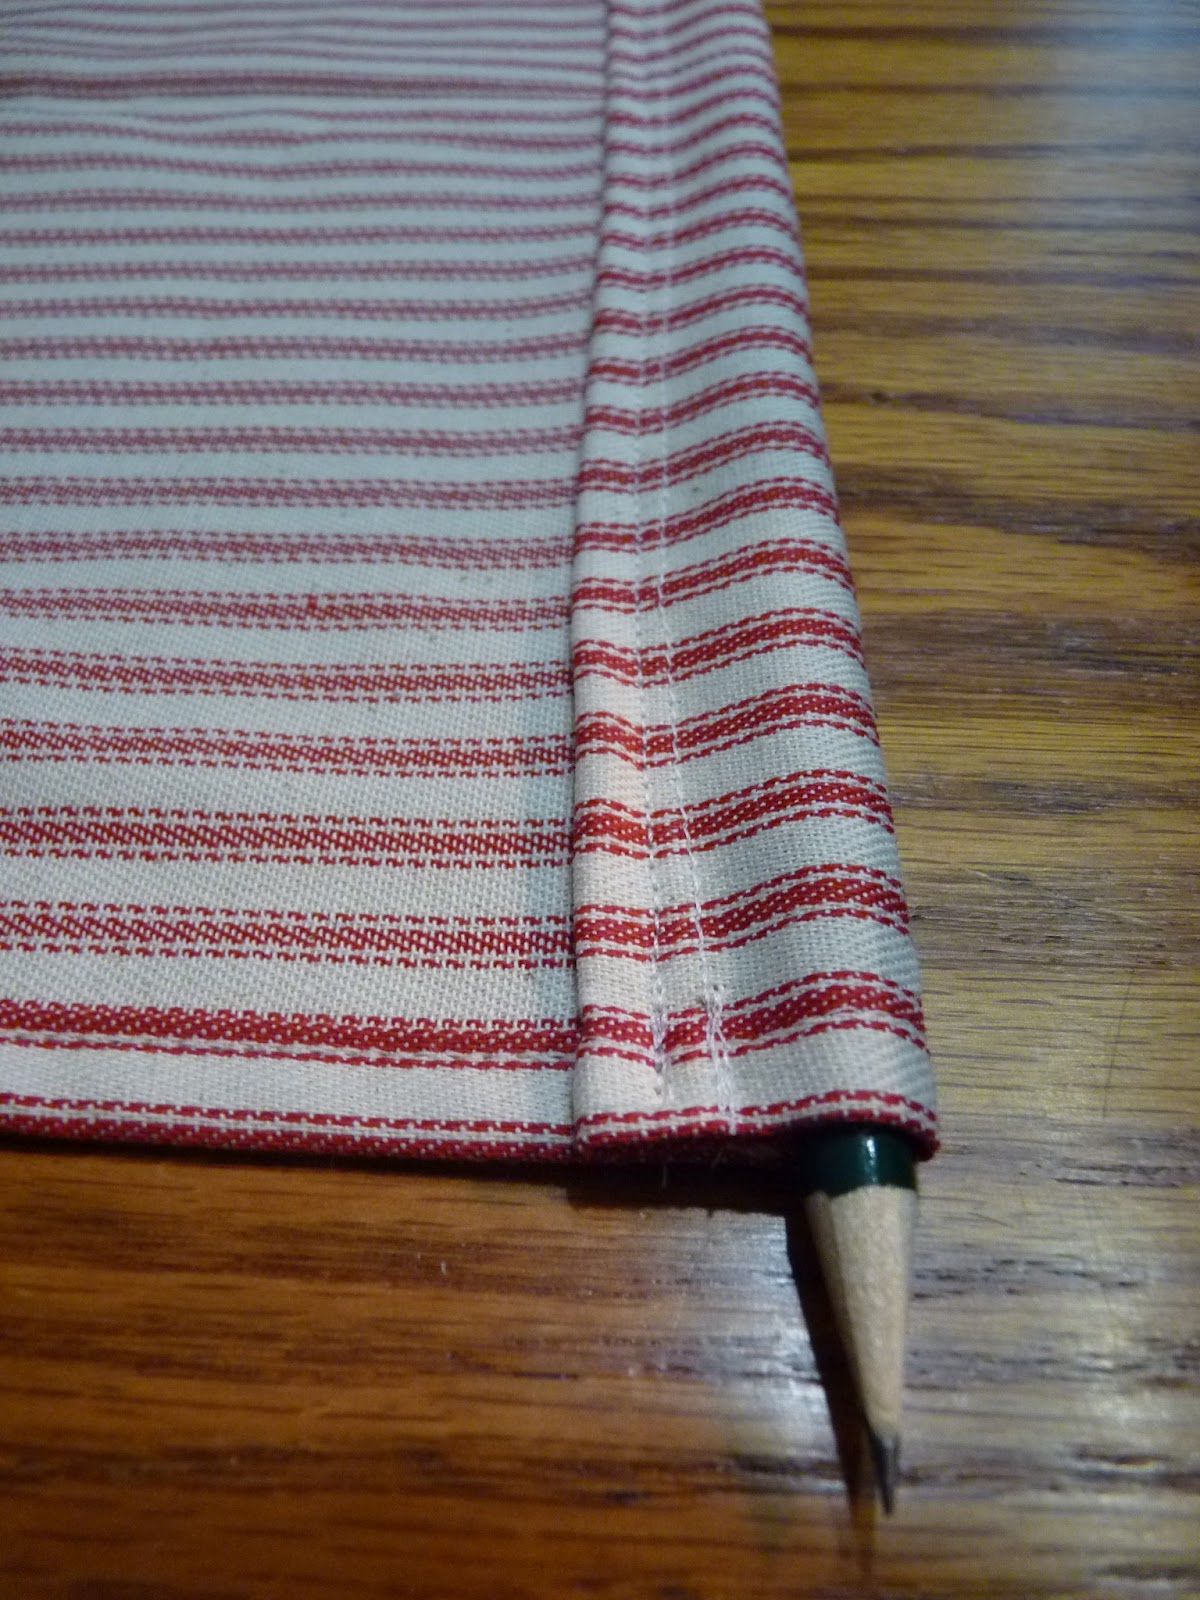
All the fraying prompted me to reinforce the fabric layers with a zig-zag stitch.
The material looked and felt like it was falling apart!
As it turns out, most of my well-meaning baby shower guests had purchased prefolded diapers that are not "DSQ" (diaper service quality). They look a lot like the absorbent, cotton version that I need, but really are only intended for use as burp cloths and other little baby messes. I didn't even know to look for DSQ prefolds before.

So, yesterday, I bought the DSQ prefolds we need and went through the whole washing routine again. In fact, since we got home really late from visiting with friends, I stayed up until 1 am this morning to run all the cycles. There really was no need to stay up so late...I'll just blame the nesting instinct (I need to be ready!). I am much happier with what came out of the dryer this time.

Much better! No fraying, and the layers got all nice and fluffy, just like they are supposed to.

Just look at the difference between the gauze-y prefolds and the DSQ prefolds. The diaper on the left looks flat. You can practically see through the side panels where there are not as many layers of fabric. The diaper on the right looks thick and plush (and it is!).


On the left, one dozen gauze-y prefolds. On the right, one dozen DSQ prefolds. What a difference!
So, now I feel ready again. Let the cloth diapering adventures begin. But I also have all these extra burp cloths. Maybe I'll embroider some cute burp cloth sets to give away as baby gifts. Or maybe Jadon is going to be a really messy burper and I'm going to actually need all of these.

Thank you, Jadon, for waiting for Mommy to wash the diapers. She wants everything to be ready for your precious little butt.

Friday, August 24, 2012

Waiting for Jadon: Blue Jeans Baby Blanket Tutorial

I am three days past my due date. Jadon is free to come when he's ready, but my to-do list is getting pretty short lately! My summer school teaching position ended about a month ago. The baby room is finally all set up. I have several meals ready in the freezer for after Jadon is born. The apartment has never been cleaner. With all this extra time, I've had the opportunity to tackle a few little projects.

Yesterday, I finished a baby blanket made out of my husband's ripped jeans and a few of his old button-down shirts. Here's the finished product:


A much larger version of this blanket currently covers my own bed. I had to save nearly 20 pairs of my family's jeans in high school in order to have enough material for a queen size. When it was finished, I decided to use the extra pieces to make a little pillow.


When guests see our bedroom, many ask how the blanket and pillow were made.

So, here's a little tutorial for a simple 4x4 design:


Use a circular object to trace and cut several pairs of jeans into standard size circles. I used a small bowl. The circles you see here are about five inches in diameter.


Cut a piece of paper into a square that inscribes the circles. Use the paper to trace squares on the inside of your jeans.


Take two of the circles and line them up back-to-back. The squares should be facing out, and the sides and corners of the squares should be lined up. Sew along one of the square sides.


You will be left with little flaps of extra fabric. Depending on how large you want your project to be, you will continue to sew the sides of the squares together until you have several long chains of circles.


Now you're ready to sew the long strips together. Use the remaining lines of the squares to carefully line up your pieces and sew the chains of circles to each other.


This will create a lovely little flower design with the extra flaps of fabric.


Now cut little squares from some other fabric. I used my husband's old shirts. The squares should be about the same size as the ones you drew on the jean circles. However, I have found that cutting them slightly smaller works just fine, too.


These little squares are going to lay inside the extra flaps of jeans fabric (are you starting to visualize the finished product?). Sewing these flaps down takes a few steps. First, you are going to anchor down the flaps and square fabric with long, straight seams.


Just make sure that you carefully hold down the flaps as you're sewing so that all of the fabric lays flat.


Continue to sew straight lines for all the vertical strips. Repeat the same process going horizontally.


With all your squares and flaps anchored down, it's on to zig-zagging! Starting at one end of your project, you will follow the edges of the flaps with a zig-zag stitch.


The finished zig-zag will look like this. Repeat the zig-zagging for all the flap edges, both vertically and horizontally.


Here's one side of the finished zig-zags.


And here's the other side. Notice how the zig-zag stitching is not perfectly symmetrical. Some of my zig-zags are more evenly spaced than others, too. That's the charm of homemade!


And that's your finished project! If you're wondering how many circles you'll need to create these project, here's how many I used:

Baby blanket: 11 by 13 (143 total jeans circles)
Queen size blanket: 25 by 25 (625 jeans circles - start saving jeans now!)
Pillow (one side): 5 by 5 (25 jeans circles)

Now if Jadon would just make up his mind on a birthday, we could put this blanket to use!