Showing posts with label sewing projects. Show all posts

Thursday, September 12, 2013

Cloth Wipes: New and Improved!

I've been cloth diapering for over a year now, and my first set of cloth wipes are looking pretty shabby. In particular, the serged edges are fraying, especially on the corners. I was so excited about the serged edges originally, but now I think french seams are the way to go for cloth wipes.

French seam picture taken from tutorial found here.
I've also found that my original terry cloth layer (just old towels) makes my current cloth wipes unnecessarily bulky. I thought I would need a lot of texture to clean up those really messy newborn poops, but the flannel layer really is more than adequate for the job.

Needless to say, I'm replacing my old wipes with new ones. In order to make these new and improved cloth wipes, the beginning is the same: cut out your fabric. I decided to use two layers of flannel this time, cut eight inches by eight inches.


With two squares of flannel facing each other, I sewed a single seam around three edges of the square. Next, I trimmed the two corners at the bottom of the "pocket" I created. *Important note: DON'T do any back-stitching at the beginning or end of your seam; you need these threads to be nice and loose later!*


Then, I turned the "pocket" inside-out, revealing the "right" sides of the fabric. Now I began the second step of the french seam. After carefully rolling out the outermost edge of the seam with my fingers, I placed my fabric under the sewing machine needle. Notice that I started my second seam about 1.5 inches away from the opening of my "pocket."


Before I reached the end of my third edge, I stopped the machine and sunk the needle into the fabric to hold my place. Next, I carefully pulled apart the end threads. I folded the flannel fabrics in on themselves, and then flattened them against each other. Going SLOWLY, I continued my seam until I had a few stitches through all four layers of folded flannel.


Leaving my needle in the fabric again, I lifted the pressure foot, and turned the fabric so that I was ready for my final seam. It was time to close the "pocket." I continued to fold in the edges of the flannel and sew through all four layers until I was close to the other end. Then, I repeated the folding and flattening, just as I had done for the other corner.


After turning the fabric one more time, I finally reached my starting point. I finished by back-stitching and forward-stitching several times.


These wipes are so much more durable than my serged ones!  I love playing around with the color and pattern combinations of all my flannel fabrics. They would also make great reusable napkins for home or lunchboxes. I think I might make some for my little kitchen messes. They are so cute and functional, I just can't stop making them...what, did somebody say upcoming Etsy shop?

*wink wink*

Friday, August 23, 2013

Cloth Diapers for Mama? Mama Cloth!

Once you start cloth diapering, it's not long before you are exposed to all sorts of cloth replacements for disposable items. For example, some people start using cloth "paper" towels that are washed and reused. Others use "family cloth" instead of toilet paper. Reusable snack bags are becoming popular in favor of plastic baggies. And of course, cloth wipes are an obvious accessory to cloth diapering.


Click any of the three pictures above for links to their original sites!
Months ago, a friend asked me if I make "mama cloth." I hadn't heard of them yet, so I looked it up and couldn't believe all the styles (just look at this google image search). As it turns out, some women ditch their disposable monthly feminine products for cloth pads, affectionately known as "mama cloth." I was intrigued, not only because they were really cute, but because it reminded me that women of the past must have used some cloth version of pads before the disposable ones were around.

Imagine trying to use one of these beauties!

I looked at a few online tutorials and came up with my own version of mama cloth for my friend. Then, I made a whole stash for myself. I couldn't resist. Is it weird that I actually looked forward to my next visit from Aunt Flo so I could try them out?

Making your own mama cloth is easy and inexpensive, especially if you repurpose fabric that you already own. To start, you have to design a simple pattern. I made mine with a disposable pad as a model.


First, I traced the pad onto a simple paper grocery bag (my favorite choice for pattern material). Then, I held the pad perpendicular to the tracing, and marked where the ends of the pads landed. After setting the pad aside, I drew concave curved lines to connect the tracings. This pattern will be used to cut the outer layers of the mama cloth. You will also need a pattern for the inner absorbent layers, which is just an outline of the model pad.


Use your pattern to cut out two pieces of flannel (I used old receiving blankets). I recommend having two different colors/patterns on your flannel so you can remember which side is the absorbent side. With the "right" side of the flannels facing in, sew a seam around the edge of the two pieces, remembering to leave a small gap (about 3 inches) for inserting your inner layers. Flip this "pocket" you created inside-out.


Next, cut out your inner layers. You have a LOT of fabric options for this part. You can use t-shirts, towels, washcloths, flannel, or combinations of these fabrics to create your absorbent layer. I also like to include a waterproof layer so I don't have to worry about any leaking. Some people use fleece or wool for waterproofing their cloth diapers, but I don't know how they would work for mama cloth. I chose an unused super-shammy (why not?) as my absorbent material, with a backing of PUL (same material used for cloth diaper covers) to make my mama cloth waterproof.

Whatever materials you choose, sew them to each other so that they stay together. I ran a seam around the middle of my oval. Then, insert your inner layers into your outer "pocket."


Now you have to close the gap you left open. Tuck in the edges of the two flannel fabrics and pin them to each other. Before sewing the gap closed, I like to sew all the way through my inner and outer layers. Since you can't really see what you're sewing, you have to feel for the edges inside to make sure your seams actually go through the fabrics.


Next, sew a seam around the outermost edge of your flannel fabrics. This seam not only closes the gap, but keeps your flannel fabrics from shifting too much when they are worn and washed.


Finally, add your closures of choice. I like snaps, but some people prefer Velcro.

I LOVE my new mama cloth stash for several reasons:
1. They are much more comfortable than disposable pads. I don't feel like I'm wearing a mini diaper.
2. They are WAY more cute than disposable pads.
3. They don't shift around at all because the flannel is not a slippery fabric against cotton underwear.
4. They fold up nice and small for travel and storage.
5. They have the same wash routine as my cloth diapers, so I just toss them in the same load with my diapers!
6. I don't have to buy pads month after month...or worry about running out!

Needless to say, I don't think I'm ever going back.

Wednesday, July 31, 2013

Cloth Diaper Tutorial: How to Replace Worn Velcro

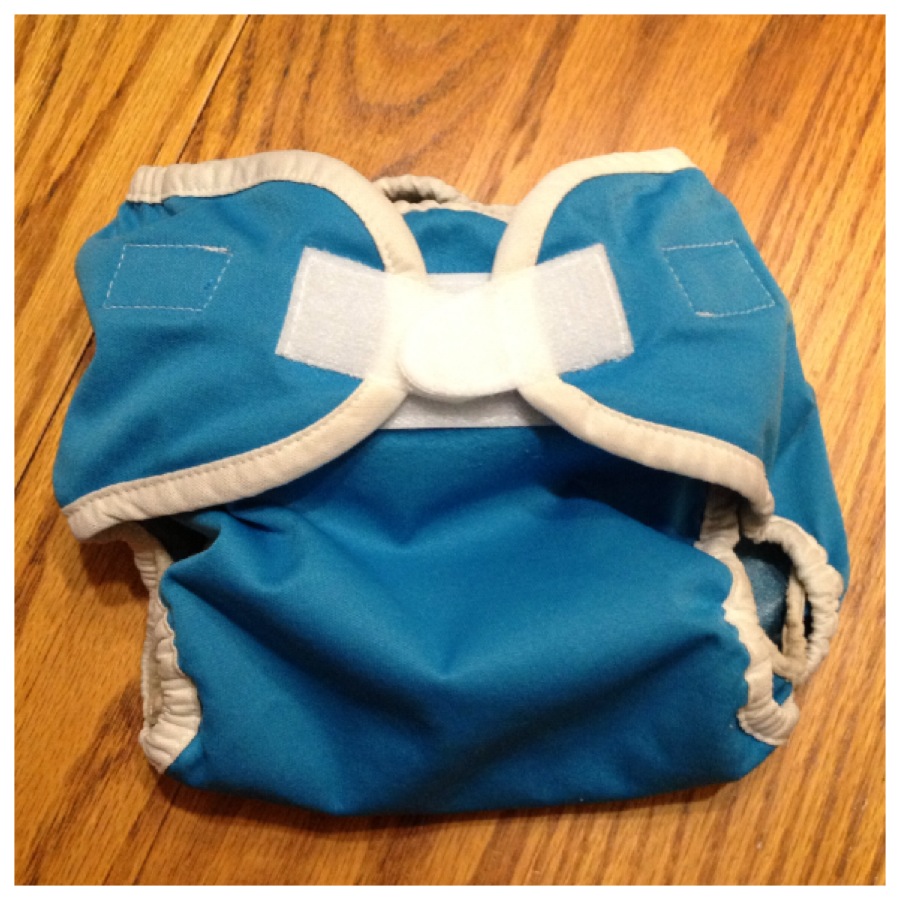
When it comes to closing cloth diapers, I much prefer snaps for their longevity and baby-proof clasp. However, some people love the ease and speed of diaper changes with Velcro closures. Squirmy babies usually don't want to hang around for snaps to be connected. Unfortunately, with months of use, Velcro "hooks"  inevitably no longer stick to the "loops," and the diaper is hard to keep closed (especially with curious baby hands that would love to rip the whole thing off!). 

When the Velcro goes bad, some parents throw up their hands and toss the diaper in the garbage. But, with basic sewing skills, and this tutorial, you can replace worn Velcro with little cost or hassle.

When Velcro starts to fray like this, it's only a matter of time before it won't hold.
The first step to replacing Velcro is to get the old stuff off. Use a seam ripper (or an X-Acto knife, like me!) to carefully cut the threads that bind the Velcro to your diaper cover.

The inside threads are easier to snip when you start your seam ripping
I find the seam ripping process much easier when I cut the threads on the opposite side of the Velcro first (the fluff tends to hide the stitches pretty well). Once you snip that first thread, you can gently tug the Velcro away from the fabric and cut the exposed threads. Keep snipping until you reach the edge of the diaper.

Carefully cut the threads that anchor down the bias tape to release the Velcro
When you reach the bias tape (white edging), you will find that the Velcro is tucked inside. You need to seam rip the thread sewn through the bias tape to release the old Velcro. If you flip the Velcro "inside out" (see pictures above), you should be able to expose some threads for snipping. Later, the new Velcro ends will be hidden away under this same bias tape.

Keep seam ripping until the front inside flap is completely free.
Once the Velcro strip is free, you need to turn your flip cover over. If the front inside flap is still tacked inside the bias tape, you have a little more seam ripping to do. The flap needs to be completely free in order to sew your new Velcro strip on.

For detailed instructions on seam ripping your front Velcro wings and laundry tabs, I already covered it in my Velcro to Snaps Tutorial. Check it out!

New Velcro pieces
Velcro comes in all shapes and sizes. Most cloth diapers have Velcro that is 1.5 inches wide. You should look for "sew-on" Velcro that is described as "soft." It will most likely come in two rolls, one of the "hook" tape, and one of the "loop" tape. Use your worn Velcro pieces as a guide for cutting your new Velcro (but purposely cut your long front strip an extra half inch or so - it's so annoying when the fabric shifts a little during sewing and you end up short!).

All set, and ready to sew...
I like to pin my Velcro in place before I sew since PUL fabric is a little difficult to work with. Make sure you tuck the bias tape behind the sewing machine needle AND that the front inside flap is folded out of the way before you begin sewing.

Go slow...it's easy to make a simple mistake if you go too fast.
Slowly follow the edge of your Velcro strip as you sew, taking the pins out along the way. Try to prevent the PUL fabric from stretching underneath the Velcro as you sew. When you reach the end, be careful not to sew through your bias tape; hold it out of the way. If you have any Velcro hanging off the end, trim it.

Front Velcro strip compete!
Repeat the same procedure on the opposite edge of your Velcro.

Reattach the bias tape
Next, sandwich the new Velcro inside the bias tape. Sew a seam through both sides of the bias tape with the cover tucked inside. If you can't seem to line up all the layers at once, sew two seams along the edge of the bias tape (one on the inside, one on the outside).

Laundry tabs are easy compared to the front strip!
Now for the laundry tabs. Simply place your new tab over the tab's stitching holes, and sew all away around the edges.

Prep your front Velcro "wings"
As for the little front Velcro "wings," you need to do a little prep before sewing them to your diaper. Place your "hook" and "loop" sides back-to-back, and sew a little arch on the end of the tab. This arch should not extend more than halfway down the tab.


Now you can sandwich the side wings of your cover inside the arched tab. Sew a rectangle, following the edge of the diaper on one side, and the edge of the Velcro on the other three sides.


Your diaper cover will now function as good as new once again! Don't throw away a perfectly good diaper that is so easy to repair...breathe new life into your diaper with some fresh Velcro!

Monday, July 29, 2013

Cloth Diaper Tutorial: How to Add Leg Gussets

This post is an extension of my previous post, How to Make a Flip Cover.

Cloth diapers can come with a variety of special features. Some are just for fun, like ruffles and applique designs.


Some are much more practical, like leg gussets.

Leg gussets...not just for decoration!
Leg gussets add an extra wall of defense for extreme baby messes (especially for sloppy newborn poops!). They are quite easy to add to a flip cover. You just need one more small piece of material for each gusset, cut in a long, half-oval shape.


In order to have an appropriate sized gusset for your diaper, measure a straight line between the leg elastic markings on your pattern. This will be the length of the straightedge on your gusset. Then, at the center of your straightedge, measure a perpendicular line that extends 1.5 or 2 inches (for a size small or large diaper, respectively). Last, draw a shallow curve from the extending line to the ends of your straightedge. This is your gusset piece.

You will also need another piece of fold-over elastic (FOE) for the gusset. To cut the FOE to the right size, stretch it out until it very nearly reaches its maximum length. Cut it so that it is the length of your gusset straightedge while it is extended. I should also mention that I like using a narrower FOE for gussets (I used 5/8 inch FOE for the gusset, while I normally use 1 inch FOE for the rest of the cover).


Next, sandwich the gusset straightedge inside your stretched-out FOE, and sew the layers together. When the elastic returns to its normal length, the gusset fabric will be gathered.

Now it's time to attach the curved side of your gusset to the rest of your main flip cover. With the urethane (waterproof) sides of your fabric facing each other, sew the two pieces together. You should line up the end of your gusset with the elastic marking on your main cover piece.

Don't worry if it doesn't look very pretty at this point. It will all be covered up by 1 inch FOE during the rest of your construction.


Finally, you sew the 1-inch FOE onto the cover, following the same path that I described in my previous post. You just have to be careful that your gusset is tucked away, safely out of the reach of your sewing machine needle.

The red diaper in the pictures was ordered by a college friend for her cousin. Although Jadon does not have any diapers with gussets right now, he had a few when he was younger. Truth be told, he has never had a poop explosion that has escaped a cloth diaper, gussets or not. So, Jadon doesn't seem to need gussets on his diapers.

However, if you know a baby who has earned the privilege of wearing one of these onesies...


...maybe you need to order some diapers from me...with gussets!

Friday, July 26, 2013

Cloth Diaper Tutorial: How to Make a Flip Cover

I haven't posted in several weeks because I've been busy with...diaper orders! I'm thrilled that my sewing skills are being put to use for local cloth diaper families. Luckily, I thought to capture my work in step-by-step photos so that others can make what I'm making. My next few posts will be sharing the work of the past several weeks.

PUL flip covers...aren't the fabrics adorable?
The flip cover diapers pictured above were recently ordered by a friend. Flip covers are used as a waterproof barrier that keeps diaper messes from leaking onto baby's clothes. I make mine with a fabric called PUL (polyurethane laminate), which has a urethane layer (waterproof side) bonded to a polyester or poly/cotton blend (printed fabric side). They are not absorbent, so a prefold, flat, or fitted diaper has to be worn inside. Flip covers can be made to fit a particular size, but I like to make them with an adjustable rise to grow with baby. They can be fastened with Velcro or snaps.


I found a free pattern for making diapers online. The patterns come in two sizes, small or large. Since my friend's daughter is about 25 pounds, she ordered the large diaper, which would fit a baby ranging from about 20-40 pounds. After my friend picked out her fabric, I cut out all my pieces (front flap, main cover, and back flap).


Next, I used a ruler and a permanent marker to indicate where I wanted my snaps to go. I copied the snaps placement from another diaper I own (sorry, it's hard to see the dots I drew because of the fabric pattern!). 

Before adding snaps, I ironed remnants of PUL fabric to the back of the cover. The urethane layers can be bonded to each other with heat. This reinforces the area where the snaps go. Without reinforcement, repeated snap use can stretch out the hole and pop off. 

You just have to be careful not to bond the fabric to your iron! If the iron touches the urethane side of the PUL, it will melt it off. I found that placing the tip of the iron on the patterned side of the scrap bonded the two pieces just enough to flip the cover over. Then I could place the entire iron surface onto the patterned side of my main cover to ensure that the scraps were completely bonded.

With the scrap PUL ironed in place, I took out my snaps pliers and and added the snaps. If you'd rather have Velcro, stay tuned for a future post!


Next, I trimmed the corners of the main cover and front and back flaps. A round edge is easier to work with when you use fold-over elastic (FOE). FOE is a type of elastic that has a crease down the middle to make folding easier. You sandwich the PUL fabric inside the FOE for a nice, finished edge to your diaper. When you want your fabric to be gathered, you pull the FOE so that it is stretched out while you are sewing. Then, when it retracts, the fabric sewn inside is gathered.

There are many different widths of FOE available to buy. I use 1-inch FOE for diapers.


I began sewing the FOE on the front side of the diaper, looping my way down the leg area, then coming around the back, and finally ending up at the opposite front side. There are marks on the free online patterns that indicate where you should start and stop gathering the PUL inside your FOE.


I used a separate piece of FOE across the front to hide my raw ends of FOE from earlier. If it's needed, I return to the FOE ends with some hand sewing to make sure nothing appears unfinished.

After all the FOE was sewn on, I added my final snaps to the side arms.


There you have it, a finished flip cover.

As far as I know, flip covers, paired with whatever absorbent inners you chose, are among the cheapest cloth diaper systems. This system also dries the fastest and requires the smallest number of diapers. PUL covers can be washed along with soiled cloths. Air drying is better than a dryer simply because it will prolong the life of the cover (especially covers with Velcro closures).

Jadon currently wears a rotation of just four flip covers that I made him. I made one cover slightly larger than the others for nighttime (which gets stuffed with three cloths to make it through the night!). I've found that three other covers are adequate for our daily needs. Flip covers do not need to be washed after every use. If Jadon has a wet diaper, the cloth goes into our wet bag for washing, and the cover is left out to dry. Also, if I notice a cover is smelly from several days of use, I'll throw it in the wet bag. If Jadon poops, and the cover gets really soiled, it goes into the wet bag with the dirty cloth. Otherwise, I just do a little spot cleaning with one of my cloth wipes, and let it dry.

It's a winning system, if you ask me!


Saturday, July 6, 2013

Pinterest Project: Homemade Nursing Tank Top

When I was pregnant with Jadon, I thought that I would return to my "normal" wardrobe when I left maternity clothes behind. However, after he was born, I realized how cumbersome normal clothes can be for breastfeeding.

I'm pretty modest when it comes to feeding Jadon. I have no problem nursing in public, but I always use a cover. I prefer shirts that have a "criss-cross" bodice that can be moved to the side for feeding. I hate lifting up my shirt if I'm not wearing a nursing tank top underneath because I don't want to expose my middle.

Not surprisingly, nursing tank tops cost more than regular tank tops. The few nursing tank tops I own started showing signs of wear after only a few months since I wore them all the time. I found myself looking longingly at the unused ordinary tank tops in my drawer when I put my laundry away.


Then, one fateful day, I absentmindedly typed "diy nursing tank top" into the Pinterest search engine. I was thrilled to see that other nursing women had gone before me in making the nursing wardrobe easier for everyday life. The solution was so simple I was surprised I hadn't thought of it myself.


I tried the technique on one of my ordinary tank tops right away. I simply cut the straps so that there was about an inch left, and curled it around to create a loop. This loop could easily be attached to the front panel of any nursing bra.

However, after I glanced at the available tutorials, I noticed that everyone had a solution for the front of the tank top, but said nothing about the straps on the back! If there was no way to attach the back of the tank top to the nursing bra, wouldn't the back of the tank top eventually fall down your back?

I found that the back was only a problem if the tank top was especially loose. Tighter-fitting tank tops stayed up on their own, for the most part. As one of my loose-fitting tank tops was falling a lot, I set out to fix the problem.


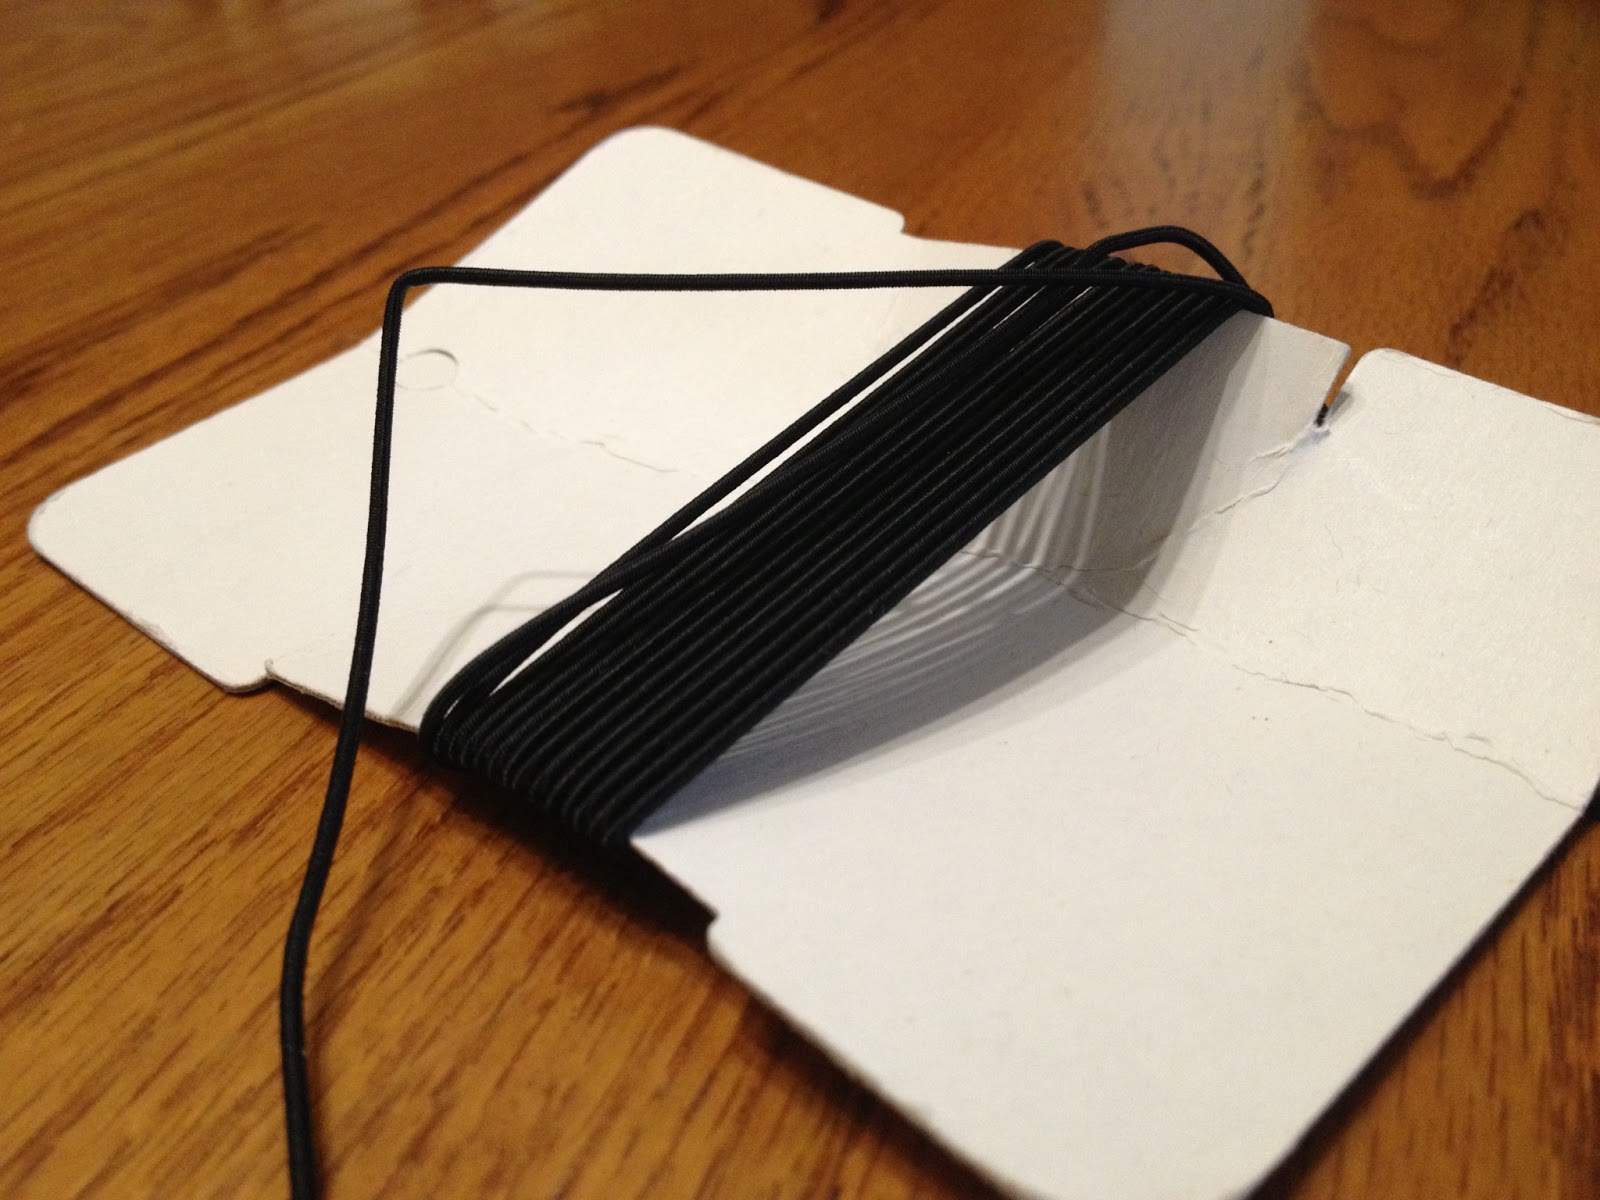
My solution involves a pair of buttons and some thin elastic.


Most adjustable tank tops have a little plastic circle for the strap to feed through on the back. Save this little circle to anchor the elastic.


If you don't have thin elastic lying around, you can also use a small hair tie. Whichever you use, loop it to the plastic circle, as pictured above.


Finally, on either side of the original back straps, hand-sew the plastic loop and a button to the tank top. The elastic piece can now be pulled around the back of the bra strap, keeping the tank top from sliding down your back.

My back solution can probably be improved upon. For example, it's a little difficult to loop the elastic around the bra strap by yourself (that is, if you're already wearing the bra). Maybe I don't really need the little plastic circle (the thrifter in me wants to find a purpose for everything!). Depending upon the fabric, and the size of your button, you might get an annoying "button bump" sticking out of your back.

I'll update this post if I think of something else for the back of the tank top. In the meantime, I'm definitely open to ideas.