Showing posts with label pinterest. Show all posts

Saturday, July 6, 2013

Pinterest Project: Homemade Nursing Tank Top

When I was pregnant with Jadon, I thought that I would return to my "normal" wardrobe when I left maternity clothes behind. However, after he was born, I realized how cumbersome normal clothes can be for breastfeeding.

I'm pretty modest when it comes to feeding Jadon. I have no problem nursing in public, but I always use a cover. I prefer shirts that have a "criss-cross" bodice that can be moved to the side for feeding. I hate lifting up my shirt if I'm not wearing a nursing tank top underneath because I don't want to expose my middle.

Not surprisingly, nursing tank tops cost more than regular tank tops. The few nursing tank tops I own started showing signs of wear after only a few months since I wore them all the time. I found myself looking longingly at the unused ordinary tank tops in my drawer when I put my laundry away.


Then, one fateful day, I absentmindedly typed "diy nursing tank top" into the Pinterest search engine. I was thrilled to see that other nursing women had gone before me in making the nursing wardrobe easier for everyday life. The solution was so simple I was surprised I hadn't thought of it myself.


I tried the technique on one of my ordinary tank tops right away. I simply cut the straps so that there was about an inch left, and curled it around to create a loop. This loop could easily be attached to the front panel of any nursing bra.

However, after I glanced at the available tutorials, I noticed that everyone had a solution for the front of the tank top, but said nothing about the straps on the back! If there was no way to attach the back of the tank top to the nursing bra, wouldn't the back of the tank top eventually fall down your back?

I found that the back was only a problem if the tank top was especially loose. Tighter-fitting tank tops stayed up on their own, for the most part. As one of my loose-fitting tank tops was falling a lot, I set out to fix the problem.

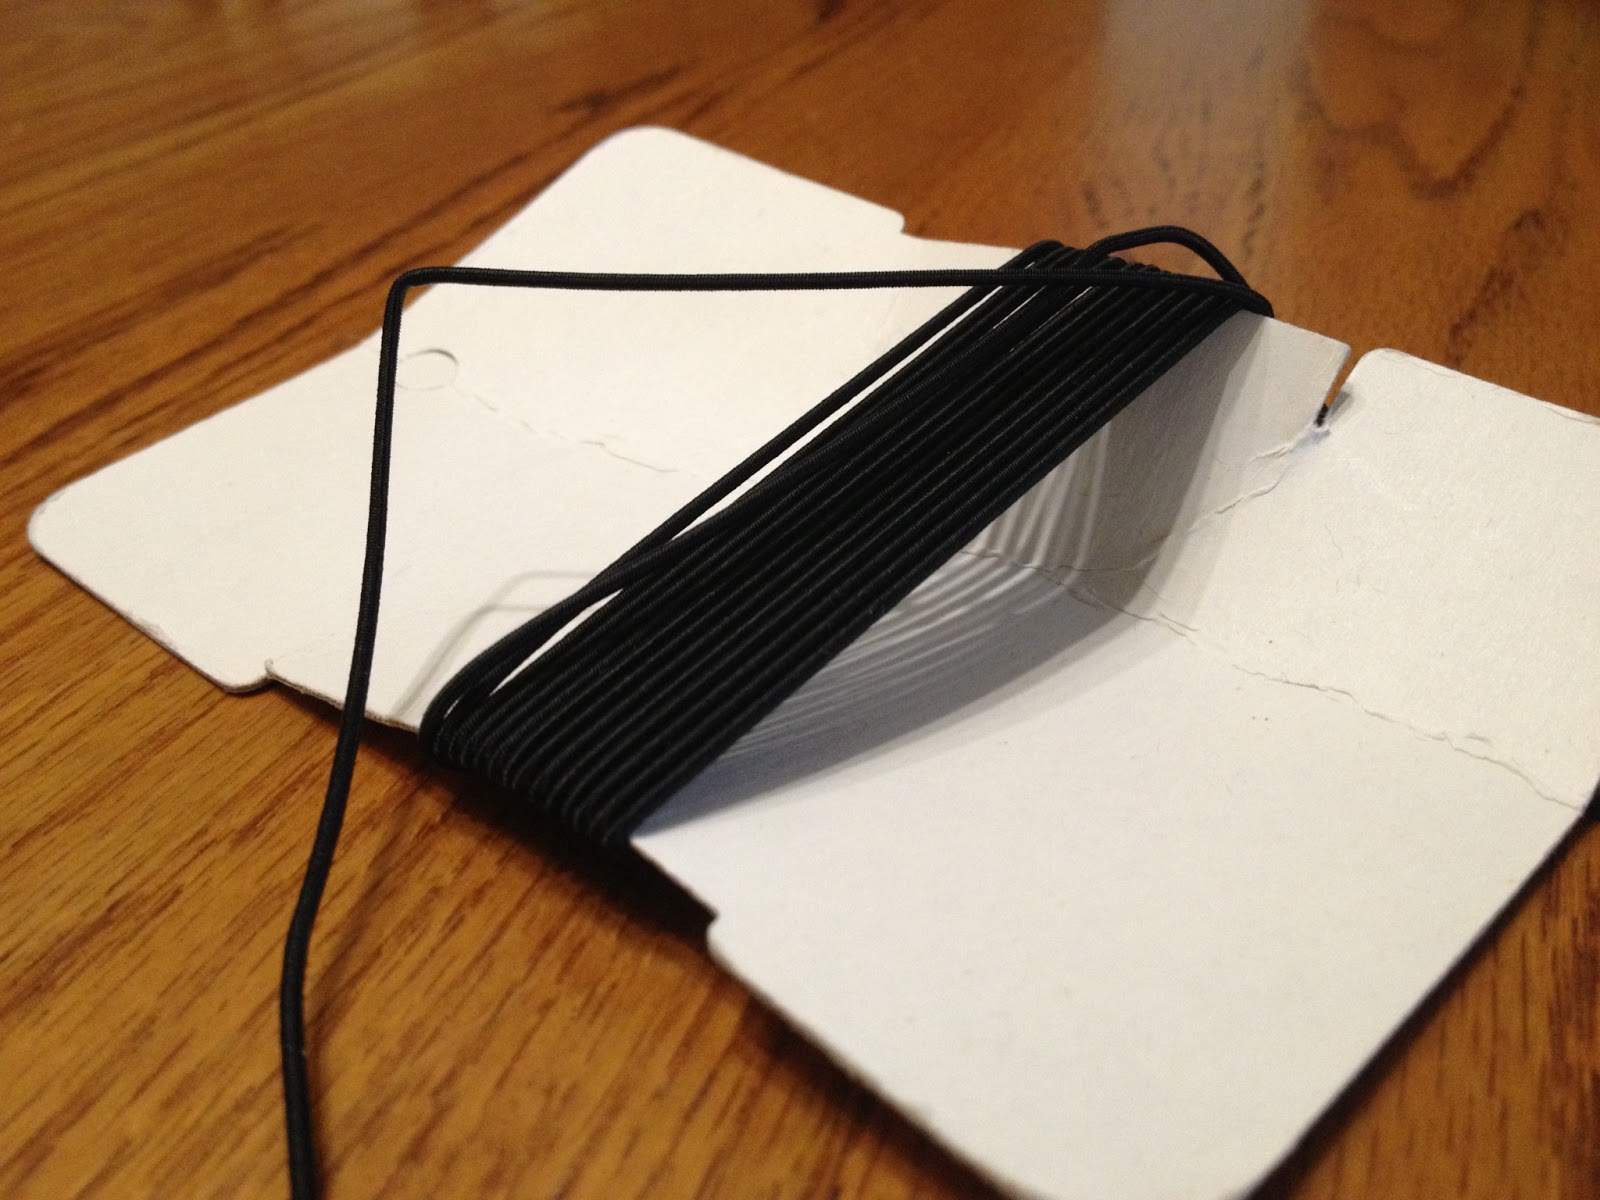
My solution involves a pair of buttons and some thin elastic.


Most adjustable tank tops have a little plastic circle for the strap to feed through on the back. Save this little circle to anchor the elastic.


If you don't have thin elastic lying around, you can also use a small hair tie. Whichever you use, loop it to the plastic circle, as pictured above.


Finally, on either side of the original back straps, hand-sew the plastic loop and a button to the tank top. The elastic piece can now be pulled around the back of the bra strap, keeping the tank top from sliding down your back.

My back solution can probably be improved upon. For example, it's a little difficult to loop the elastic around the bra strap by yourself (that is, if you're already wearing the bra). Maybe I don't really need the little plastic circle (the thrifter in me wants to find a purpose for everything!). Depending upon the fabric, and the size of your button, you might get an annoying "button bump" sticking out of your back.

I'll update this post if I think of something else for the back of the tank top. In the meantime, I'm definitely open to ideas.

Monday, May 13, 2013

Pinterest Project: Cloth Bags

I'm a sucker for organization and decor. When I find time for Pinterest, I find myself constantly pinning baskets, boxes, shelving units, and other storage ideas. This little cloth bag caught my attention on so many levels: it's pretty, functional, non-breakable (I have a walking eight month old who is getting into EVERYTHING already), and I could make it myself since it's made entirely of fabric.


As I skimmed the tutorial, I noticed that the author borrowed the cloth bag idea from yet another craft blogger (Don't you just love the Internet? So easy to share!). I learned from the original creator that you need to use interfacing to give these bags their nice shape. Interfacing is a material that stiffens a fabric by being ironed or sewn onto it. The blogger couldn't remember what type of interfacing she had on hand, but tried to describe it to her readers: "It's like a thick paper, not as thick as card stock, but thicker than printer paper." 

That got me thinking. Why would I have to buy special interfacing when it sounds like a stiff, yet flexible paper will do the same thing? I started searching around my apartment for paper products, and found my stash of paper grocery bags. They seemed like the perfect thing to try since they are bendable but still strong enough to carry groceries around.

\

To make these bags, I cut 10-by-10 inch squares, five pieces of fabric for the outside (red patterned material), five pieces of fabric for the liner (four blue and one red), and five pieces of brown paper bag. I also cut two 10-by-4 inch rectangles for the handles.


I decided to construct the outside of the bag first. I made a little fabric "sandwich" with the brown paper bag as the "bread" and my red patterned fabric as the "meat" (the "right sides" of the fabric were facing each other). The brown paper bags were surprisingly easy to handle with the sewing machine. This first seam joined one of the sides and the bottom of the bag.


I continued sewing pieces together until all four sides were attached to the bottom piece. The giant "plus sign" should have fabric on one side, and brown paper bags on the other side.


Next, I connected the sides. I sewed the side edges together with the fabric facing in, and then turned the bag inside out. Turning the paper inside out was probably the trickiest part of this whole process, but it didn't tear at all. I was already loving the way the paper was holding up the fabric so nicely.

After making the outside of the bag, sewing the lining together was a piece of cake. You can see how the lining fits nicely inside the brown paper bag. 


To create a clean, finished top edge, I trimmed about an inch of the paper bag off. That way, I could fold the red patterned fabric over the edge. Then, I could sew the folded lining to the inside of the bag.


I folded and pinned everything in place. Then, before sewing, I made the handle, which I wanted to be tucked between the pinned layers.


The handle was constructed by sewing the long edges to each other, making an inside out tube. After turning it right-side out, I ironed the tube so that the seam was centered on one of the flat sides. Then, I sewed two seams along both edges of the handle to maintain the flat shape.


Next, I pinned the handles in between the layers of the bag.


Finally, I was ready to sew the top edge of the bag. Originally, I thought I would sew one continuous seam  around the entire bag, but the side edges had too many layers. So, I decided not to sew over the corners at all. I sewed four separate seams, one on each side, carefully removing pins as I went, and sewing right over the handles when I came to them.


The bag looked great, but I wanted to make even more defined edges. So, I flattened the edges of the bag and ran seams along each one. This created the sharp square lines I was going for.


In the end, I made two more bags and gave the entire set of three to a friend for her birthday. I had noticed that she repinned my inspiration picture on her own Pinterest board. I love that Pinterest makes homemade gift giving so easy. You can snoop on friends' boards without them ever knowing, and you can be confident that they'll like what you make!

Tuesday, April 16, 2013

Pinterest Project: "Ratatouille" Quote Onesie

If you spend any amount of time on Pinterest, you're bound to see a "do-it-yourself" onesie scroll across your screen eventually. I've been saving a few plain white onesies to make into gifts when the right idea and momma-to-be came along. That time has come, my friends.

So cute! Too bad they'll all get covered in spit-up and poop before long.
I have a good friend due in June with her second baby. Since she's a "real food" junkie, I thought making her a onesie along the theme of raw, whole, local food would put a smile on her face.

I almost made my own version of this onsie, until I found my "Ratatouille" quote.
When I happened upon a darling quote from the movie "Ratatouille," I knew I had found the inspiration I needed.


I wanted to use a variety of cool fonts to write the quote, so I was back to Pinterest for some ideas.


I really liked the simplicity of the designs above, especially because they are so easy to read. I also was attracted to the clean, horizontal lines that broke up the space so nicely.


So, I started playing around with fonts on my computer.


Once I settled on my design, I printed it out and placed it inside the white onesie. I used a permanent fabric pen to carefully trace the letters. I'm really glad I didn't attempt fabric paints because it was hard enough to make the letters clear with a pen. I ended up doing a "dot" technique instead of drawing lines. The fabric tends to bunch up as you put on enough pressure to drag and write.

That's right, baby! Eat the good stuff!
This particular fabric pen requires a "heat set" in order to make the design permanent. When I finished "dotting," I ran the onesie under the iron, and then stepped back to admire my work. I think my friend will love it.


Saturday, March 23, 2013

Pinterest Project: Etched Glass

Yet again, Pinterest has inspired my latest project: glass etchings. The process is incredibly fast, and relatively simple. Though I've etched glass before, I've mostly worked with pre-made stenciled designs and patterns. The pictures below from Pinterest gave me the idea to write something on glass.     


To make an etching, you have to put a paste on the glass that basically eats away at the surface, creating the frosted look. The most tedious part of the process is masking off the area you don't want etched.


Several weeks ago, I saved an old maple syrup bottle with a handy pour spout for storing homemade salad dressing. My husband has had to ask what was inside more than once, so it became the perfect item to label. I used some old alphabet stickers to form my letters. Because I wanted the actual words to be frosted, I cut out the empty letters from the sticker sheet.


I made sure the glass surface was clean and dry, and then arranged my stickers how I wanted them. Next, I used a q-tip to liberally coat the negative space where the glass was exposed. I used a paste called "Armour Etch," which only needs to sit on the glass for a few minutes.


After about three minutes, I rinsed the paste off of the bottle. Every time I etch glass, I'm nervous that it doesn't work because I can hardly see a "before-and-after" difference while the stickers are on and the glass is wet. However, once I removed the stickers and dried the bottle, I was pleased to see my "salad dressing" label clearly written.

Now I've got the etching itch! What other glass items could use a little face-lift? Candle holders? Wine glasses? Mirrors? There's no telling what I'll etch next.

Saturday, February 9, 2013

Pinterest Project: Homemade Laundry Detergent

Since I've already tried (and loved!) making homemade cleaning solutions for glass, wood, and other surfaces, I feel like I'm willing to put any homemade product to the test. My family recently ran out of store-bought laundry detergent, so I decided to replace it with a homemade version. I found a recipe from this website through Pinterest. Not only did it seem easy to make, but the author claims that this mix will last a whole year (at four loads of laundry a week)! The recipe cost the author about $28, but included optional ingredients. Being the frugal gal that I am, I decided to test the recipe without the optional ingredients to see if they are really necessary for my family's needs.


My "essentials" recipe consists of four ingredients, which cost me a total of $11.34:

  1. 1 (4 lb 12 oz) Box of Borax- Found in the detergent aisle
  2. 1 (3 lb 7 oz) Box of Arm & Hammer Super Washing Soda- Found in the detergent aisle
  3. 2 (14.1 oz) Bars of Zote Soap- Found in the detergent aisle
  4. 2 (2 lb) Box of Arm & Hammer Baking Soda- Found in the cooking aisle 

The optional ingredients that I chose not to include are OxyClean and fabric softener crystals. I figure that I can add these on an as-needed basis. You will also need a large bucket for mixing your ingredients, and a tool for grating.

There are really only two steps for creating this laundry detergent. First, you have to grate the bar of Zote Soap.


Grating the soap was by far the hardest and most time-consuming part of this process. Even though the website claims that you could use a food processor for this task, I decided to go at it by hand. I wanted to avoid the hassle of cleaning out the processor, mostly because I didn't know how hard it would be to get all the soap off. I really didn't want soapy food in the future. So, in an effort to make grating by hand easier, I tried slicing the bar into manageable-sized chunks. I even periodically cleaned the blades of our hand-cranked grater in order to keep the little holes from gunking up.


By the end, my hands were so tired of grating that I couldn't finish the final chunk of soap without having to take a break. But, seeing as I was impatient to start mixing, I called on Jon to do the last little chunk. Next time, I may brave the food processor because the soap wasn't that hard to get off.


The second and only other step is mixing all your ingredients. I sat on my kitchen floor to do this part. The author of the original recipe recommended adding ingredients in increments as you mix, which was a great tip. It would have been difficult to evenly distribute all the parts if I dumped all of each ingredient in before mixing.

The consistency reminds me of a cake mix with coconut flakes in it.
I've used my new detergent for a week now, and I'm very happy with the results. Even without the extra ingredients, my laundry feels soft and smells great. I don't know if I'll ever go back to store-bought detergents since this homemade version is so cheap!

Now if only I knew it was safe for cloth diapers! I may have to do a test-run in the future.

Monday, February 4, 2013

Pinterest Project: Reuse Old Candle Jars

My apartment has a little window sill that separates the kitchen from the living room. I keep a collection of candles on it. Several candles have been burned to the end of their wicks. Naturally, I hated the idea of throwing the cool jars away, so I had to find a way to clean out the leftover wax. I found two methods on Pinterest and decided to try both.


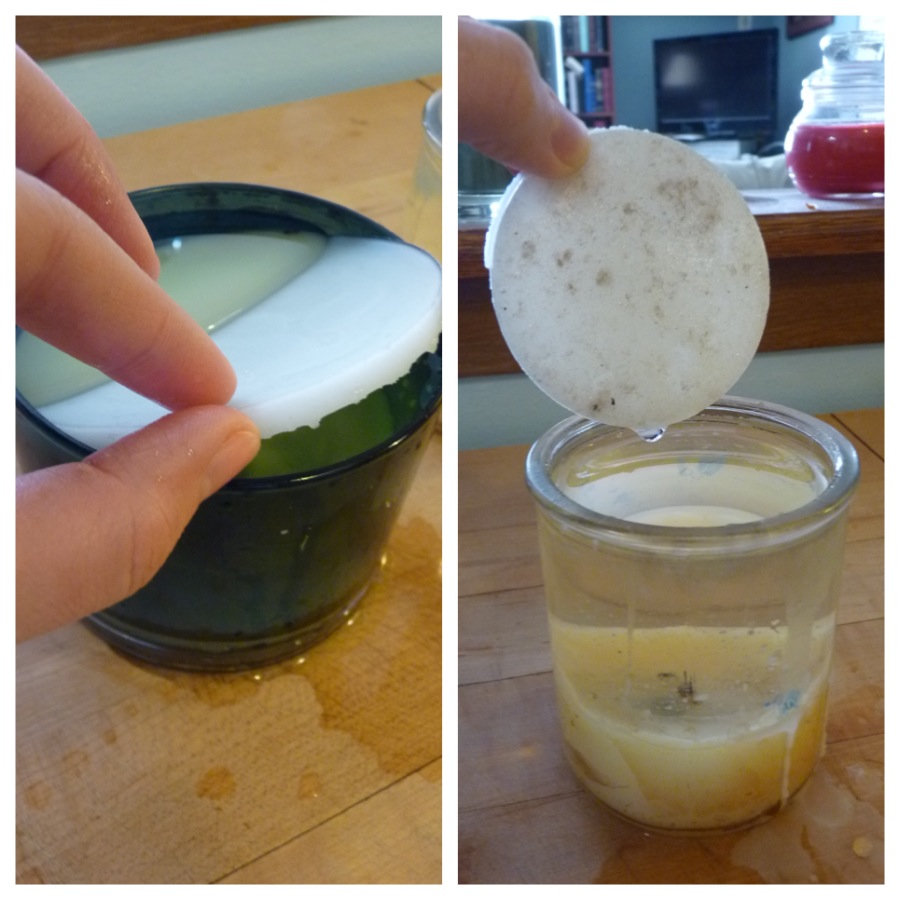
One method is pouring boiling water into the jars, which melts the wax. The wax is supposed to float to the top of the water and then cool in an easy-to-remove layer. I chose two candles for trying this method.


Sure enough, the wax started to liquefy just moments after the boiling water was poured. I let the water cool overnight and found a nice layer of wax on top the next morning. However, there was still wax left at the bottom of both jars. Maybe this method is best for jars with very little wax left. As a side note, I discovered that my green jar was actually coated with a green waxy film in order to color the glass. Even with all the wax removed from the candle, the inside walls would still feel waxy, so I'm not sure if this candle jar is still useful to me. Maybe I'll use it to hold a homemade candle?


Another method for removing wax is to put the candle in the freezer. Frozen wax can be chipped out a lot easier than room-temperature wax. I found this method to be very effective. There were a few remnants of wax left inside the jar, so I decided to try the boiling water method to get the last bits off.


Not only did most of the wax bits float off of the previously frozen jars, but it took care of the remaining wax from one of the boiling water jars. I was expecting another thin layer of wax, and at least two more rounds of boiling water before this jar was completely clean. In fact, the layer of wax was so thick on top that it was hard to remove.


Now I have some cool free glass jars! I love the fact that some candles come with air-tight lids, too. I can't wait to find something to store in these.


Oh, and I saved the wax. Are you surprised? I just may have to make that homemade candle after all...

Friday, January 4, 2013

A Crocheted Christmas

Since I seem to be addicted to my crochet needle these days, many of my Christmas gifts this year were crocheted hats.

Last fall, a friend of mine ordered two hats for her children, sending me pictures from Pinterest to imitate. I delivered them to her just before Christmas when we got together for a visit.

From Pinterest board to...a cute bear hood modeled by my son Jadon!
From Pinterest board to...a darling "newsboys" cap for my friend's baby boy!
 I looked for gift ideas for my brothers for weeks. It's so hard to come up with homemade gifts for guys! As soon as I saw some "Angry Birds" hats on Pinterest, my search was over.  

Above, my inspiration...below, my brothers!
My husband and I just got back from visiting his extended family in Virginia for the holidays. It took over 19 hours in a rental car to get there. When I wasn't entertaining my almost-four-month-old, I passed the time finishing presents for the girl cousins and my sister-in-law. I fell in love with these wide flowered headbands on Pinterest...

 ...so I made my own version for the girls!

Wide multicolored headband, modeled by me!
My husband was able to find books for all but one of the uncles and guy cousins. Since his extended family originated in Pittsburg, they are all Stealers fans. Naturally, I crocheted a hat of Stealers colors for the last cousin:


What a merry crocheted Christmas it was this year!