I am now nine days past my due date!
Knowing that I'm looking for projects to do, a friend emailed me last night with a request. She just moved into a new house this month and needs a curtain to cover the clutter of a kitchen shelf stacked with spices.
She gave me the fabric she wanted and we discussed the look she was going for. She wants the curtain to cover everything on the shelves, hang from a simple rod, and be slightly gathered. Basically, she was envisioning something like these curtains I found on Pinterest:
Here's the tutorial to make a simple curtain for yourself!
 |
The dimensions of her shelf are 24.25" wide and 40" tall.
I cut the fabric 36" wide (to have enough fabric to create the gathered look),
and 46" tall (to accommodate for hems and the loop of fabric around the hanging rod). |
 |
| To create the side seams, I fold the sides of the fabric over once... |
 |
| ...and then again. This hides any fraying edges. |
 |
I used to always pin the fabric down before I started sewing, but sometimes I don't have to anymore.
These vertical stripes are such a handy guide to make sure I'm sewing straight! |
 |
| Now to create the loop at the top which will go around the rod. I started by sewing a half inch hem. |
 |
| A half inch hem can be made easily by folding the fabric over and making sure it lines up with the width of the pressure foot. Just a little trick I discovered a few years back. It's saved me from a lot of pinning! Notice that my needle is oriented slightly to the left. I wanted my seam to be a little closer to the edge of the fabric, so I changed the setting on my machine to have the needle be a little off center. |
 |
| Then, you fold the edge with the half inch hem over again. Make sure that you create a loop large enough to slip your rod inside. Since my friend bought a skinny 5/16" rod, folding the fabric over one inch will give us plenty of room. |
 |
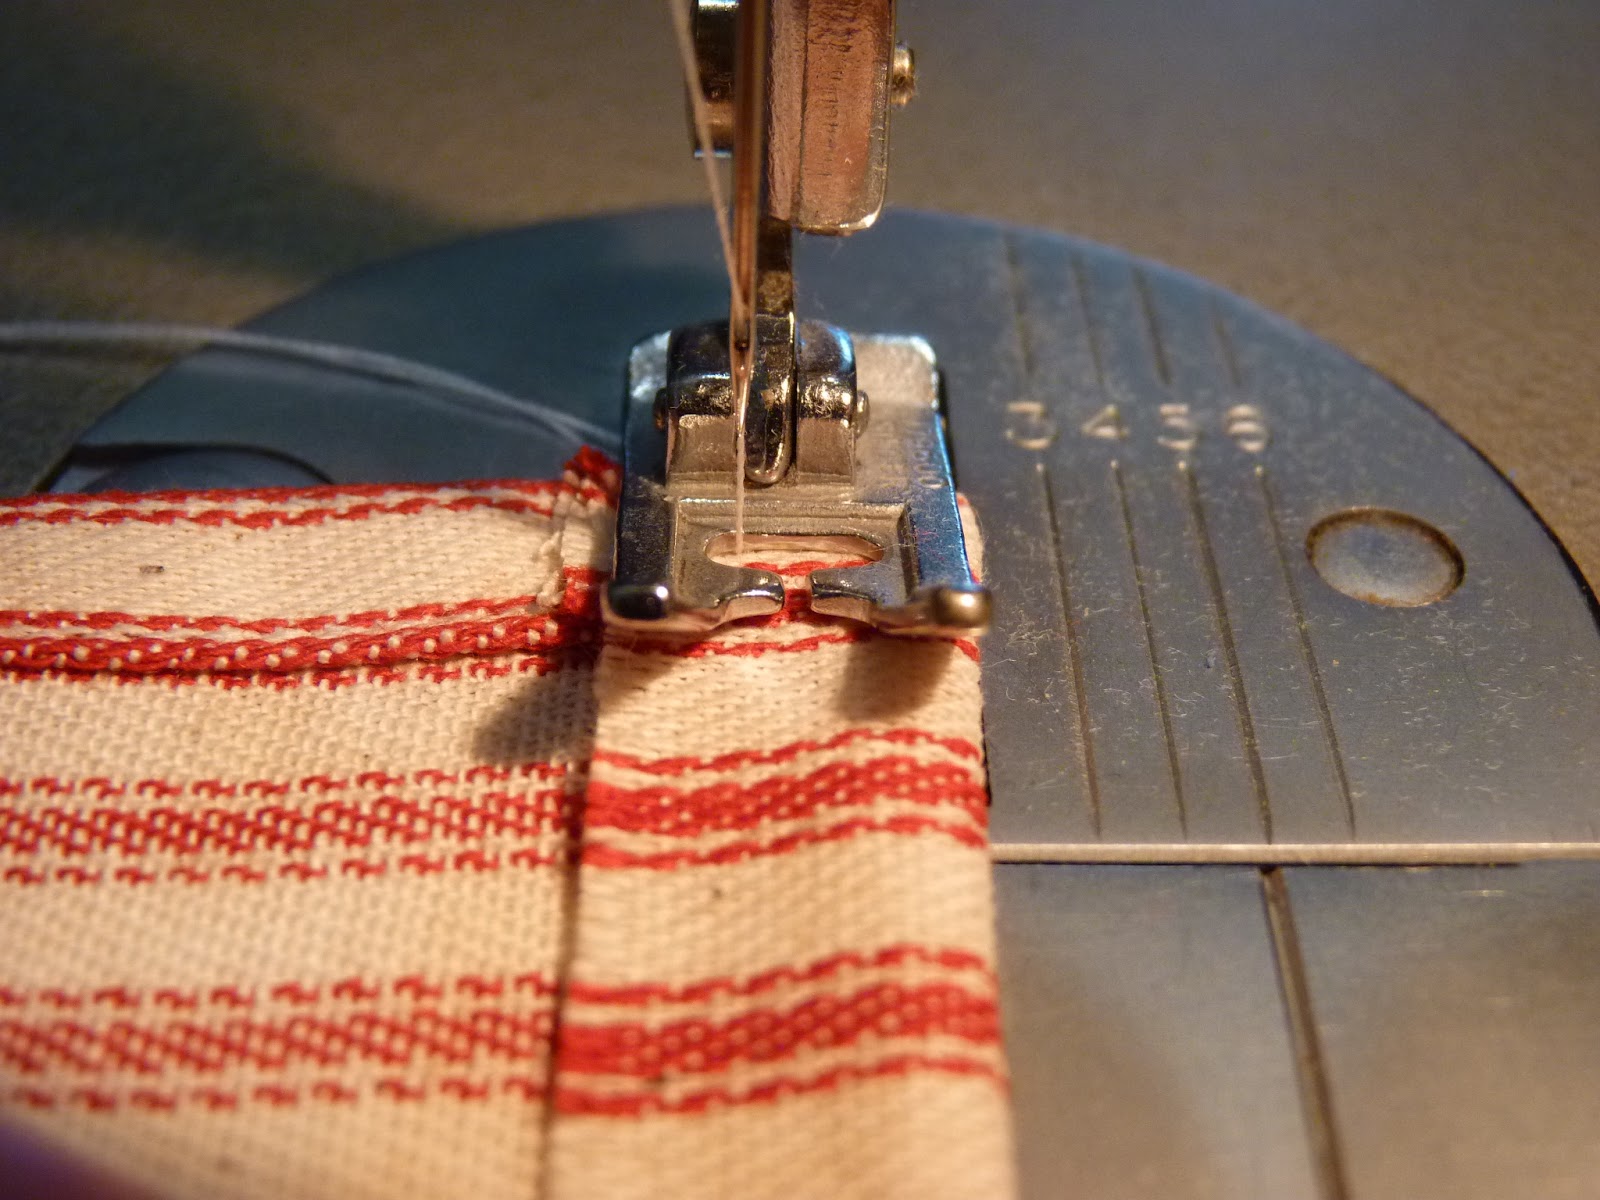
| If you still aren't in the mood for pinning, you can use these handy lines on your sewing machine as a guide. When your machine needle is in the center position, the line labeled "6" is exactly 6/8" from the needle. Similarly, the "3" is exactly 3/8" from the needle. |
 |
| I lined up the edge of my fabric with the line labeled "6," and kept the needle in the off-center left position. This means that my seam is *about* 7/8" from the edge. That's close enough to an inch for me. |
 |
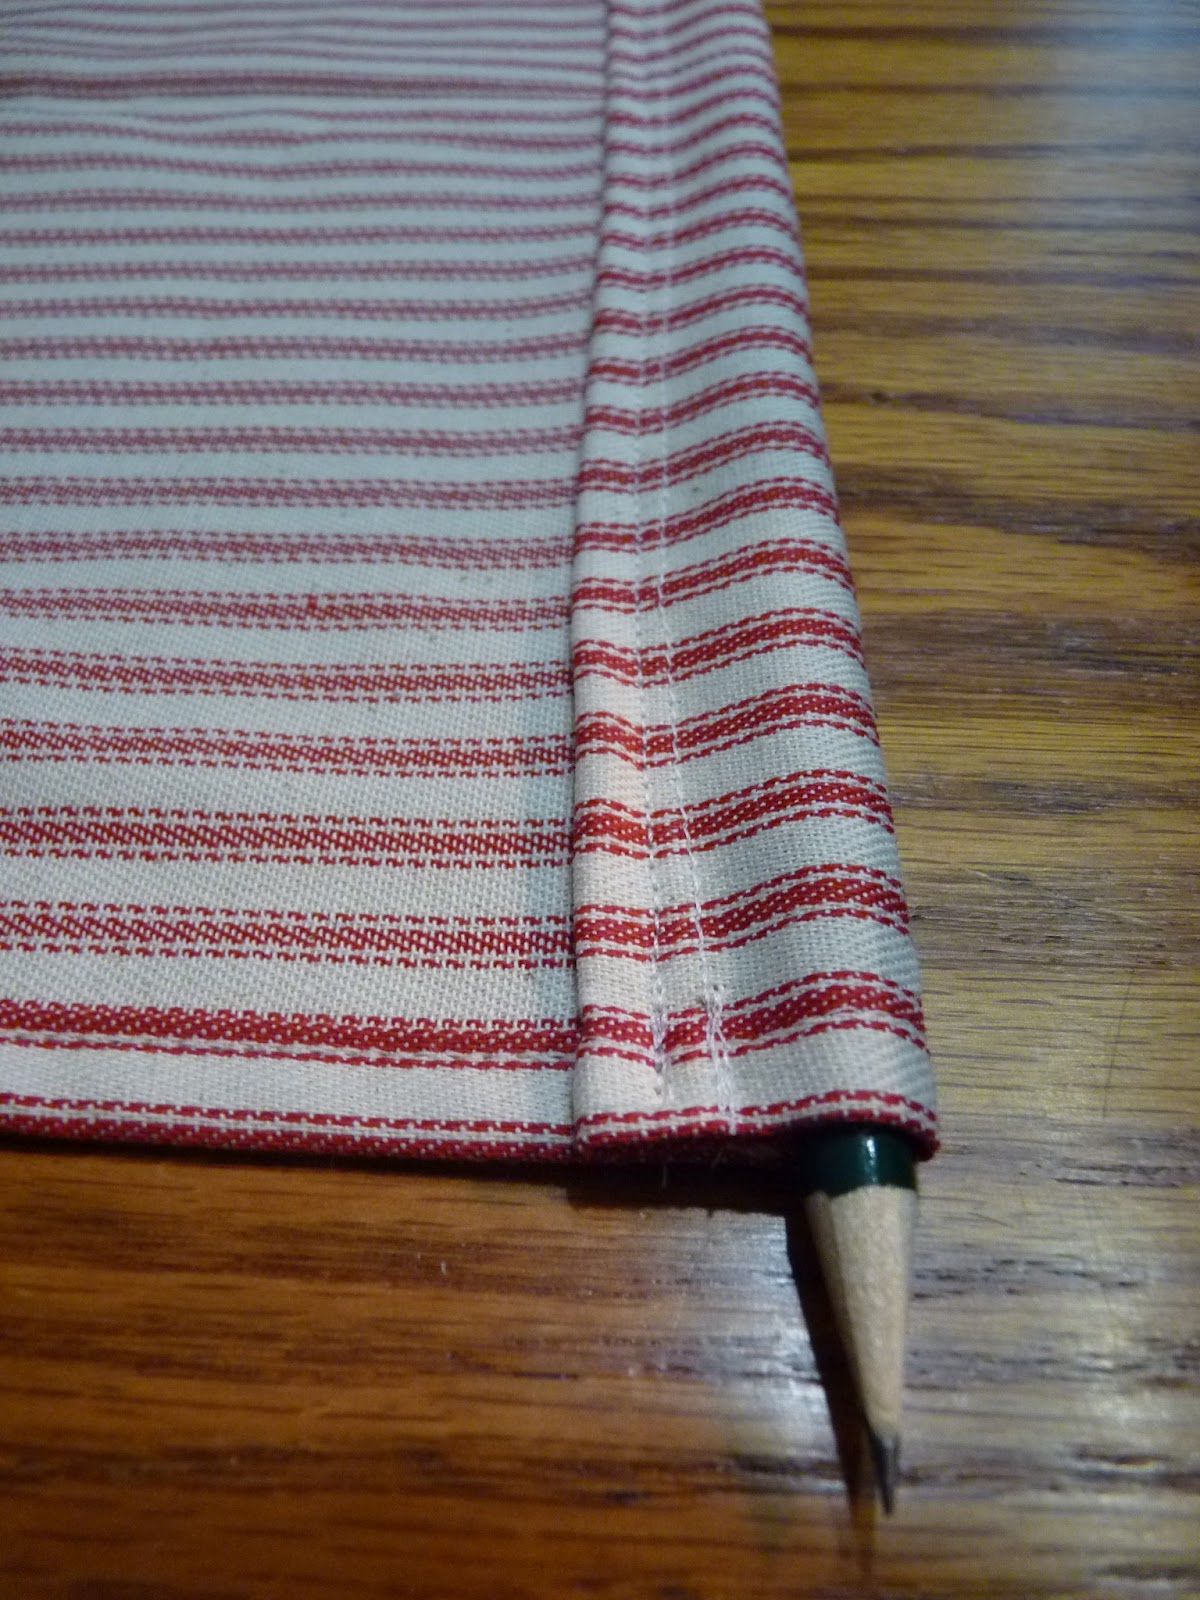
| Now you have a nice, even loop to hang on a rod, as demonstrated with the pencil. The side hems and the top loop is done. Before I could sew the bottom hem, I had to do a little more thinking about the total length of the curtain. |
 |
| I knew my friend's shelf was 40" tall, but was that the height of the shelf, or the distance from the rod to the floor? If I made the curtain 40" long, but the rod is 38" off the floor, the curtain would drag on the floor, which would look funny. I called my friend and she told me to make the curtain 39" long since the rod would sit about 1" from the top of the shelf. As I would need about an inch to create the hem at the bottom, I carefully measured 40" from the top of the curtain and trimmed off the excess fabric. |
 |
| I folded a half inch, and then another half inch to create the bottom hem. Following the width of the pressure foot, and making sure the stripes continued to line up properly, I completed the final hem. |
 |
When I brought over the finished curtain, she had the dowel rod ready, and we slipped it easily into the long loop of fabric. Her husband had already installed the little white hooks into the shelf for hanging the rod. You could also buy a tension rod that fits inside the top shelf for hanging the curtain.

Now all she needs to do is cut the dowel to the width she wants. We've already started talking about ways she could use the leftover striped fabric somewhere else in her kitchen. Window curtains? Chair cushions? Hot pads? The possibilities are endless! |


I love it! And love being a part of your blot!! Thanks again!
ReplyDelete