 |
| Here's all the materials sitting on my desk. Say hi to Jon, working on his computer in the background! |
I sketched a lot of ideas before I figured out what I wanted to embroider on the blanket. I finally decided upon Jadon's name and the date of the baptism.
I know that I want the embroidery in one of the corners of the blanket. I only own one size hoop at the moment, so my design has to be contained within the wooden circle pictured above.
Luckily, the fabric is slightly see-through, so I can simply trace my design onto the white cotton with a pencil.
If you want to embroider a thin line, you thread the needle so that only one strand of embroidery thread is woven into your fabric. However, I want a nice thick line of thread so that my words are easy to read. Two strands will be woven into every stitch.
I've never been taught how to embroider properly, so I just make up stitches that give me the effect I think that I want. I have no idea what the stitches are called, or even if they have names at all. As far as I can tell, the stitch I want to use for Jadon's blanket is most like a "chain stitch" (thank you, Google image search!).
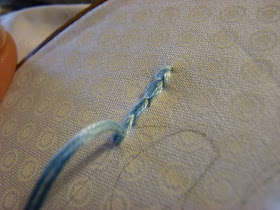
To create this stitch, you start with the classic "up-down" steps of hand sewing. But before you pull the thread tight all the way, you guide the needle up between the two strands of thread.
Then you pull everything tight.
You continue to sew up and down, always coming up inside the two strands of the previous stitch. It quickly creates a nice chain of stitches.
Here's the first word, done! I need a little more time to finish the rest of the embroidery design before I can put the front and back fabrics together and add the satin edging.
Stay tuned for blanket completion in the days to come.


